I recently completed an expert report that provided a reasonable explanation for the probable cause of a failure in DN 280 PVC cooling water pipelines. This resulted in the dismissal of claims for approximately €100,000. The failure resulted from the leakage of adhesive joints during a pressure test. The system's floor plan was sized within a 130 x 30 m rectangle. To substantiate its claim against the pipe manufacturer, the installation contractor commissioned an expert report that concluded the leak was caused by excessive pipe ovalization. This is a completely erroneous position, as Table 1, titled "Nominal outside diameters and tolerances," in the PN-EN ISO 1452-2:2010 standard, refers to comment d: "The requirements regarding ovality apply only to pipes before they leave the manufacturer's premises."
Due to the above, the manufacturer suspected that the real cause of the failure was errors during the gluing of the joints. The sleeves were cut in half and the gluing quality was assessed in the designated areas.
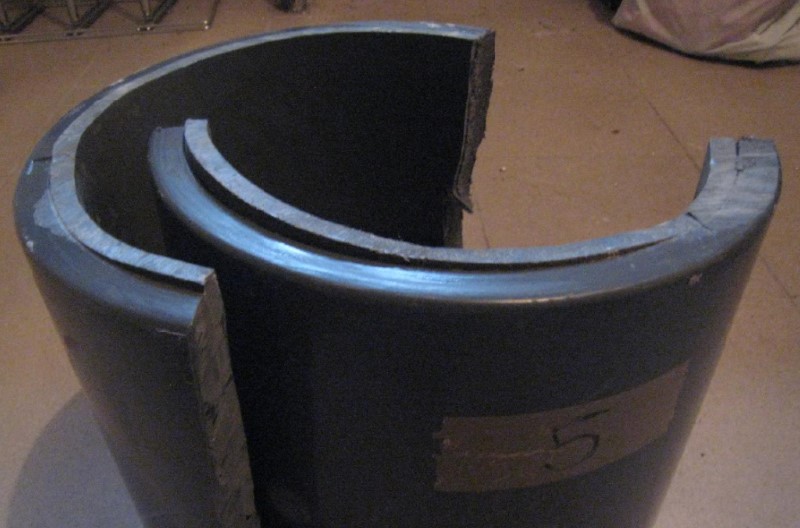
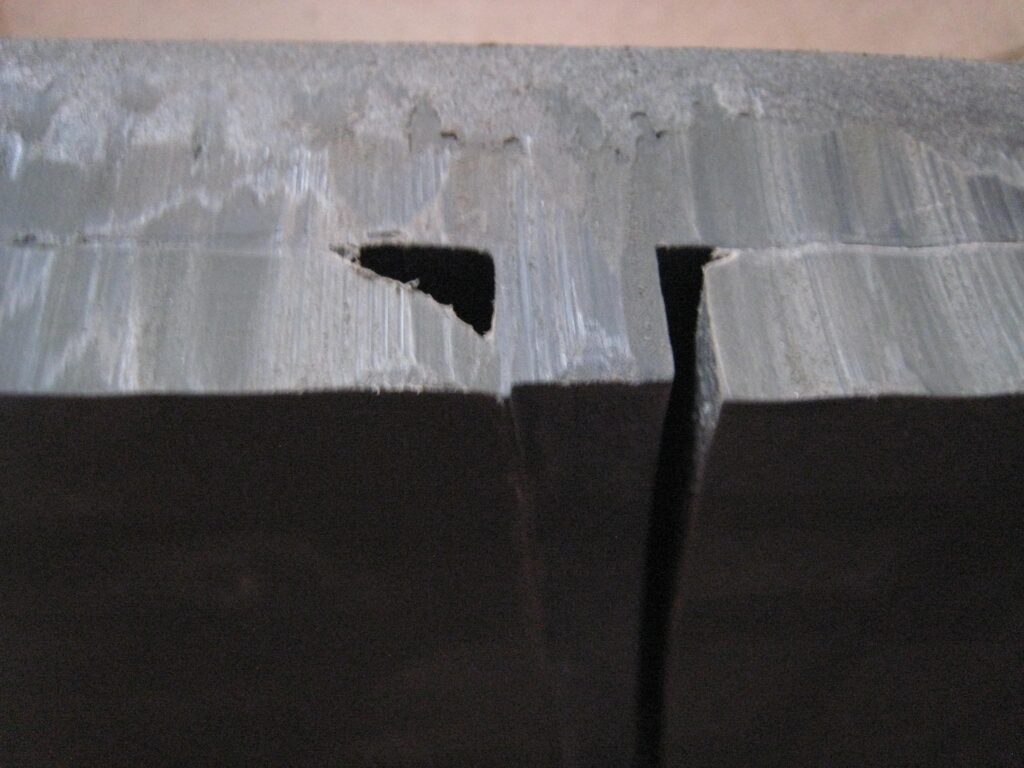
The photo below shows the lack of chamfering of the right pipe edge, which is inconsistent with the pipe manufacturer's requirements described in the gluing instructions.
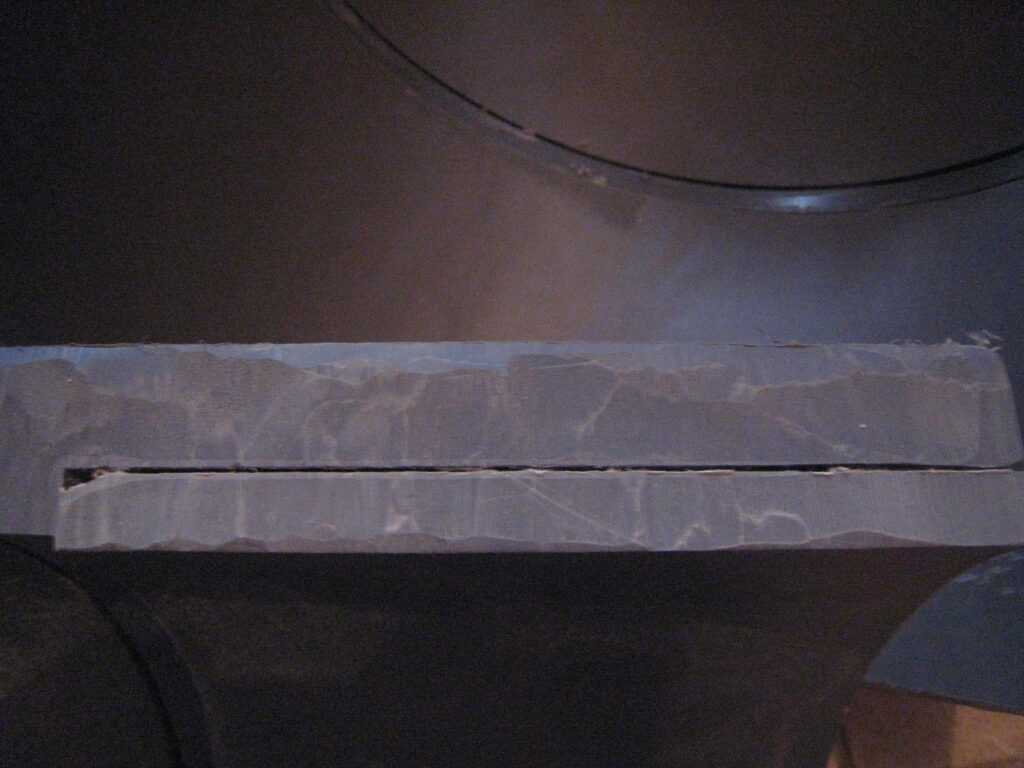
The photo below shows a missing layer of adhesive across the entire length of the pipe inserted into the sleeve, which is essentially the source of the leak. The pipe end was beveled, but not enough adhesive was applied.
The photo below shows a missing adhesive layer approximately ¾ of the way into the socket. The pipe end was beveled, but not enough adhesive was applied.
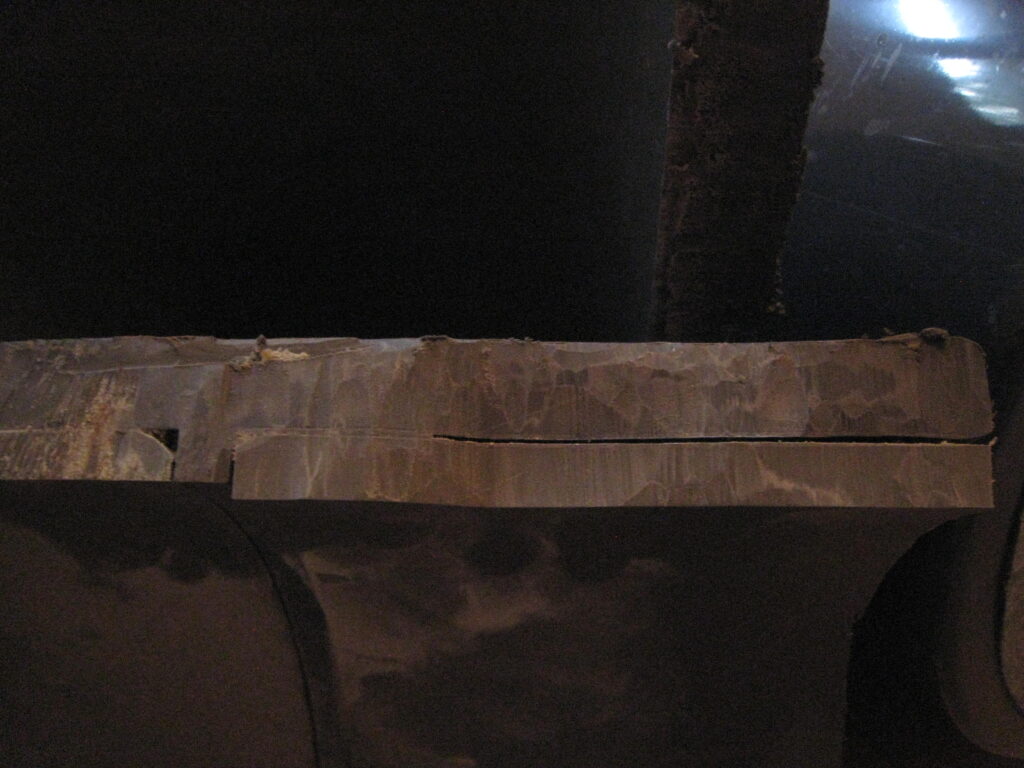
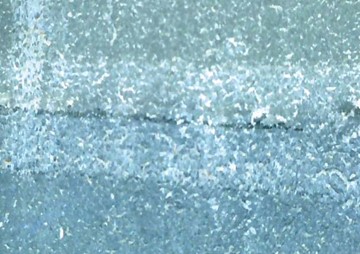
The photos below show sections of the joint showing a lack of adhesive at a depth of several millimeters. The shiny, scratch-free pipe surface is clearly visible, proving that the author did not interfere with the adhesive joint during the tests.
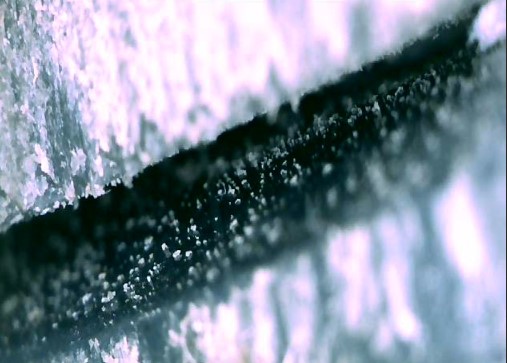
To demonstrate the microscopic image of a properly executed joint, another fitting was examined. A thin line, darker than the adjacent sections, is clearly visible. This represents a properly applied adhesive layer.